I was looking for a new kind of fruit dip and I found this one night so I knew we had to try it! I made it for my pampered chef party over the weekend and it was a HIT! It was also very easy to make.
Nutella Dip-The Family Kitchen
1 cup plain greek yogurt
1/2 cup nutella
Mix together and chill until ready to use! I served it with strawberries, raspberries, pineapple, pretzels, and graham crackers.
**Everyone LOVED this dip! I was so glad to see there was some leftover! This will be made again at least the nutella had nice healthy dose of protein with the yogurt!
.jpg)
Showing posts with label appetizer. Show all posts
Showing posts with label appetizer. Show all posts
Thursday, September 22, 2011
Sunday, December 19, 2010
Pizza Rolls

Pizza Rolls-shared from Hoosier Homemade
Pizza Dough:
2 1/2 cups flour(ap and ww)
2 tsp vital wheat gluten
2 tsp sugar
2 tbsp olive oil
2 tsp yeast
7/8 cup warm water
3/4 tsp salt
2 tbsp italian seasoning
Pizza/pasta sauce
2 cups shredded mozzarella cheese
pepperoni slices
Place dough ingredients in bread maker according to manufacturer's directions. Start on dough cycle.
Once dough is done, take out and roll thin.*Like I mentioned before I would cut the dough in half and make them smaller. Once rolled out, top with your favorite sauce, sprinkle with cheese and layer on pepperoni. Starting with the long side of the dough, roll up jelly roll/cinnamon roll style and tuck in ends as needed. Slice into 1 inch slices and place on cookie sheet. Bake at 350 degrees for 10 mins.
**By making the big roll it was very thick and very hard to cut. I got impatient so i just cooked it like a calzone, but I did cut a few slices into the rolls. The rolls were excellent and even the girls at the cookie swap loved the "calzone" rolls. The dough was soft and fluffy while the cheese got a little crispy.
Saturday, December 4, 2010
Apple Sausage Cheddar Balls

Apple Sausage Cheddar Balls-adapted from Cooking During Stolen Moments
1 1/2 cups whole wheat flour
1 tsp baking powder
1/2 tsp baking soda
1/2 tsp salt
1 lb bulk sausage(I only used 12 oz)
2 cups shredded cheese
1/4 cup maple syrup
2 apples, shredded
1/4 tsp allspice
Mix all ingredients together. Form into balls and place on cookie sheet. Bake at 375 for 15-20 mins.
**Q tried a couple bites, but his appetite has been lacking a bit since he was sick over the weekend. I ate these and thought they were fabulous. You couldn't really taste the apple, but the sweetness was there and it off set the saltiness of the pork and cheese! Definitely a keeper!
Wednesday, October 27, 2010
Cranberry Apple Chutney

I also cut the sugar back and used some maple syrup in it as well, an idea I saw in Bon Appetite.
Cranberry Apple Chutney-adapted from Taste of Home
3/4 cup sugar
1/2 cup maple syrup
1/2 cup water
1 12oz pkg fresh or frozen whole cranberries
2 large tart apples, peeled, and finely chopped
1 medium onion, chopped
1/2 cup raisins
1/4 cup brown sugar
1/2 cup cider vinegar
1 tsp cinnamon
1/2 tsp salt
1/8 tsp allspice
1/8 tsp ground cloves
1/2 cup walnuts, chopped and toasted(omitted)
Place water, syrup, white sugar in a pan and bring to a boil. Reduce heat and simmer for 3 mins. Carefully stir in the rest of the ingredients. Return to a boil, reduce heat and simmer for 25-30 mins or until desired thickness is achieved, stirring occasionally. Stir in walnuts just before serving.
**Mine did simmer for much longer than 30 mins...I would say at least an hour if not longer. But I was trying to achieve the picture in the magazine and after 30 mins it just didn't resemble that. So I let it go much longer. This was a tingy bit tart(as I cut the sugar) and it was a lot better with my chicken, but I do like my cranberry with chicken or something savory. A wouldn't try it even though I told him it was "applesauce", but Q devoured it! I was surprised. I think next time I might leave either the allspice or clove our (only use one) as it seemed that both was too much for me. I'd like to serve it for thanksgiving, but I also know I have people coming that are very adamant about their "jelly".
Friday, October 22, 2010
Sweet and Sour Kielbasa
This is one of the meals we made during out cooking day. This was something my mom always made growing up, mostly for potlucks or a get together. It only involves five ingredients and is super quick to put together and it even cooks itself! This does make a lot of sauce so I serve it over rice or stir minute rice in about 30 mins-1 hr before we eat it! You can also adapt to how much you need as well. I used 2 pkgs and split it between two of us, but you can use up to 4.
Sweet and Sour Kielbasa
3-4 pkg of your favorite kielbasa(I use butterball turkey)
1 jar pasta sauce
1 12 oz jar salsa
1-2 tbsp grape jelly
1-2 tbsp brown sugar
Slice kielbasa and place into a slow cooker. Add remaining ingredients and stir well. Cook on low for 6-8 hours. You can add more or less of the jelly/sugar depending on how you like it!
**This is one of our family favorites and is generally ALWAYS gone at potlucks!
Friday, October 15, 2010
Buffalo Chicken Meatballs in Blue Cheese Sauce

Buffalo Chicken Meatballs
1 lb ground chicken(breast)
1 egg
3 palmfuls breadcrumbs
about 3 tbsp blue cheese
2 tbsp hot sauce
sprinkle of garlic powder
sprinkle of onion powder
mix all ingredients together. The mixture is a bit wet, but do not over mix. Add a few more breadcrumbs if you like. Form into balls and lay on rimmed baking sheet. Place in 350 degree oven for about 20 mins or until cooked through.
**Now these on their own were pretty good, but I loved them even more with the blue cheese sauce on them and mixed with spaghetti squash. It actually impressed me on how good it was!
I knew I wanted a sauce to go over the meatballs and the pasta. Then I decided to use the spaghetti squash I had instead. This sauce is easy to bring together, but it just took forever as it was still very thick! Plus the squash seemed to take forever to cook as well.
Blue Cheese Sauce-adapted from All Recipes
4 oz softened cream cheese(I used low fat)
3-4 tbsp blue cheese
1+cup milk
2 tbsp hot sauce(more if you like)
Place all ingredients into a sauce pan and whisk. Cook until cheese is melted and heated through. You may want more or less milk depending on how thick you want it. After a while I lost count on how much I added!
**This was super tasty and was perfect with the meatballs. The spiciness was perfect for me as it wasn't super spicy. You can adjust it to your liking.
Saturday, October 9, 2010
Tomato Bisque

I decided to be lazy and NOT peel the tomatoes, I figured I could roast them and puree them enough that I wouldn't need to peel them. I was wrong...you will either have to peel the tomatoes by cutting an x in the ends and putting them into hot water and then straight into ice water, they should peel easily at this point. You can also press the soup through sieve once its done, this helped get the seeds and peel out!
Tomato Bisque-shared from Andrea the Kitchen Witch
6-8 tomatoes, blanched and peeled
2 cups stock
1 sprig basil(or 1 tbsp dried basil)
salt and pepper
1 onion, diced
3 cloves of garlic, minced
1/3 cup half and half
1 tbsp olive oil
1/2 cup white wine
In a soup pan, heat the olive oil. Add in onion and cook for about 3 mins, add in garlic and cook for another 3 mins until they start to brown around the edges. Add in the wine and scrape any brown bits off the bottom of the pan. Allow the wine to cook until reduced to about 2-3 tbsp.
Crush the tomatoes and add them to the pan. Add in basil, season with salt and pepper. Simmer for 10-15 mins. Once the tomatoes are soft and breaking down, add in chicken broth. Simmer for 10 mins. Remove basil stem(if used)
Transfer soup to blender and puree until velvety smooth. Place the soup back into the pan and stir in the cream.
**This was pretty good after I strained the "peel" and seeds out. I did need more salt added to it. I did roast my tomatoes in the oven with evoo and salt and pepper so I didn't think I would need more, but I did! A perfect way to use up your tomato harvest!
Friday, September 24, 2010
Creamy Apple Quesadilla
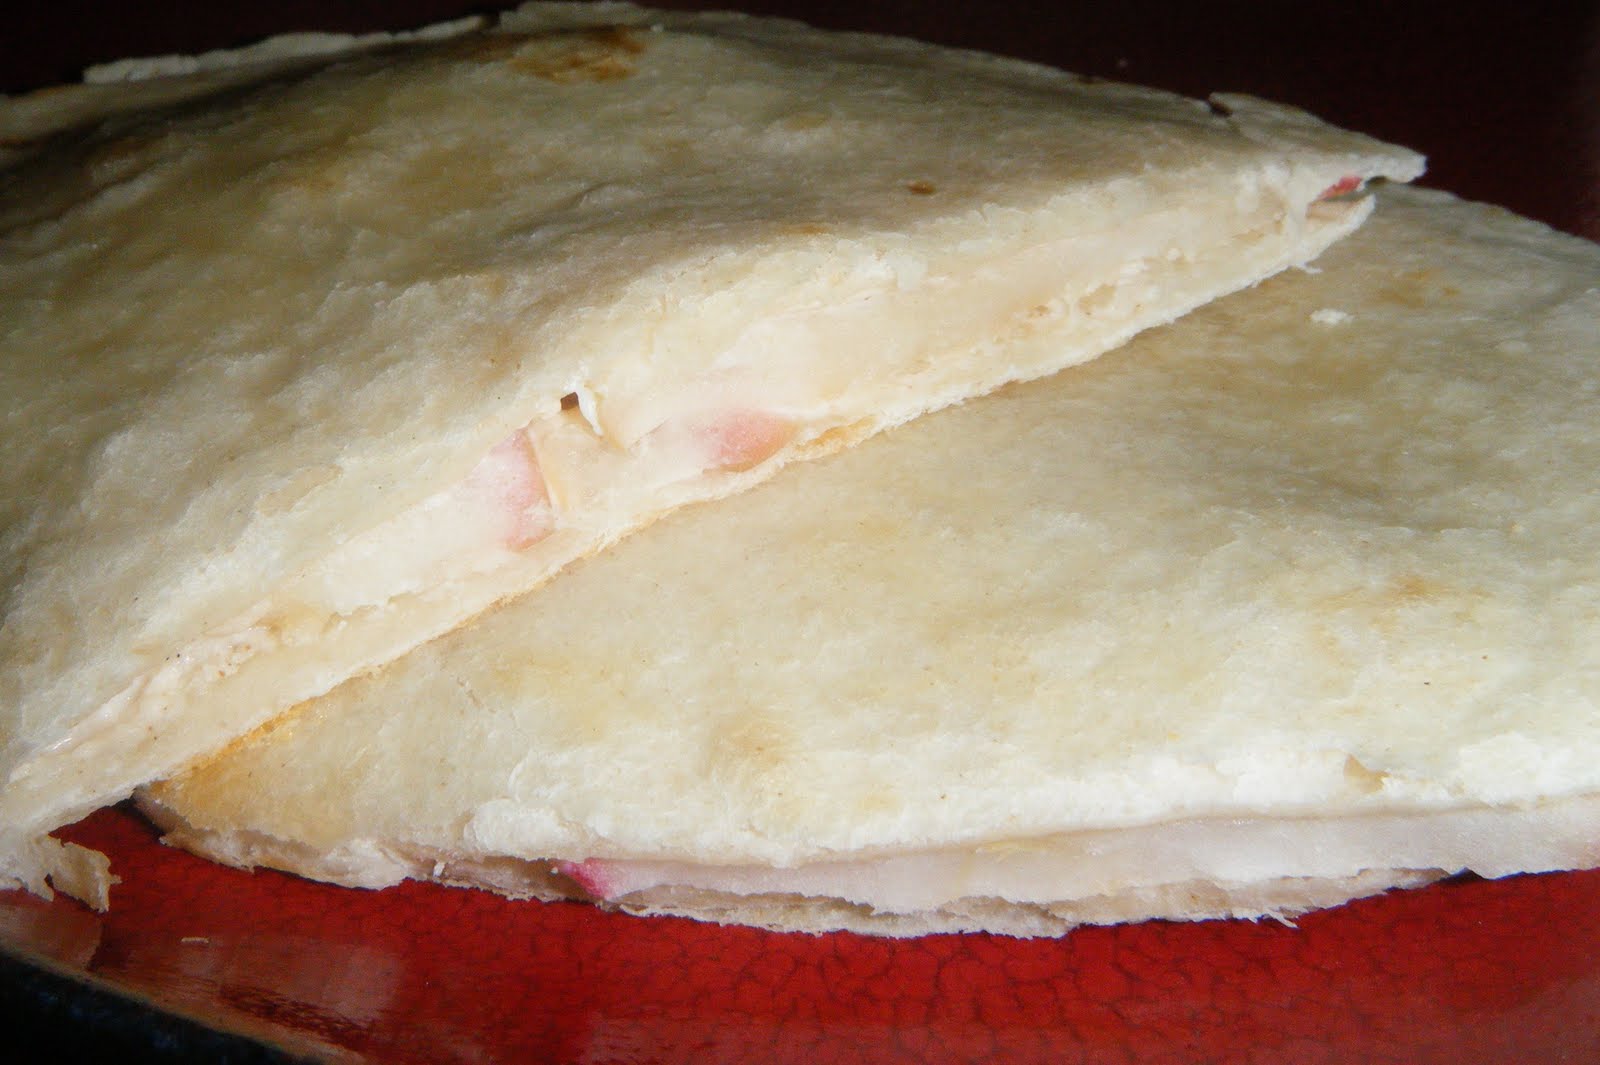
Creamy Apple Quesadilla-shared from Pillsbury
1/2 apple, sliced thin
4 oz low fat cream cheese, softened
1 tbsp brown sugar
1/4 tsp cinnamon
2 flour tortillas
butter or spray oil
cinnamon and sugar for topping(optional)
Mix together cream cheese, brown sugar, and cinnamon. Spread some onto each tortilla. Place apple slices on top, cover with other tortilla. Spray with oil/butter and place in pan, cook until brown. Flip and allow to brown on the other side. Remove from pan, sprinkle with cinnamon and sugar, cut into quarters.
**This was a really quick and easy snack to make. We did serve ours with dinner. It was tasty too!
Sunday, September 19, 2010
The Best Homemade Meatballs

The Best Homemade Meatballs-shared from Family Fun magazine
3 lbs ground meat(sug. turkey, beef, and pork)
1 10 oz pkg frozen, chopped spinach, thawed and drained well(omitted I had none!)
1/2 cup parmesan cheese(omitted, as I ran out!)
3 large eggs, beaten
2 tbsp italian seasoning
2 tsp garlic powder
2 tsp salt
1tsp red pepper flakes
1/2 cup breadcrumbs or panko
Preheat oven to 400 degrees.
In a large bowl combine all ingredients throughly but do not over mix. Pinch off a tsp at a time...or I acutally use my small cookie scoop to get the same amount and then I roll them. Place on rimmed cooked sheet. Bake for 20-25 mins until they are browned and cooked through. **Mine only took about 15 mins because they were smaller.
**Usually when I make meatballs they seem dry and unflavorful...hence another reason I don't make them very often. I picked up the meatloaf mix at Bj's(which is a bulk food store) so I decided to make it all into meatballs and freeze them. These were awesome, tasty, and moist! They were even better the next day! My brother in law and sister in law loved them as well. We used them in meatball grinders(sub,s hoagies, or sandwiches!)
Friday, August 27, 2010
Pepperoni Pizza Puffs

Pepperoni Pizza Puffs-shared from Crazy Jamie's Blog
3/4 cup ap flour
3/4 tsp baking powder
1/2 tsp dried oregano
3/4 cup milk
1 egg, beaten
1 cup shredded mozzerella cheese
1 cup diced pepperoni
Whisk together flour, baking powder, and oregano. Stir in milk and egg. Fold in cheese and pepperoni until mixed in well. Set aside for 10 mins. Meanwhile lightly grease a mini muffin pan. Scoop batter into pan and bake at 375 for 20-25 mins or until golden brown.
**These were delicious! They were light and airy and the cheese made them crunchy on top! They do taste just like a pizza...in a muffin!
Tuesday, August 10, 2010
Veggie Loaded Nachos

Veggie Loaded Nachos-adapted from Rachael Ray
1 tsp olive oil
2-3 cups beans(I used white cannellini)
1 cup chopped carrots
2 tsp minced garlic
1 onion, diced
1 zucchini, shredded
1/2 tbsp cumin
1 tbsp chili powder
1 bag frozen corn, thawed
1 14 oz can diced tomatoes, NOT drained
2 cups shredded cheese
tortilla chips
Saute onions and carrots over med heat in 1 tsp olive oil for about 5 mins. Add in garlic, zucchini, and beans. Sprinkle with spices and stir. Stir in corn. Cook until heated through. Turn broiler on. Lay chips on baking sheet and cover with "nacho" mix. Sprinkle with cheese. Place under broiler for about 5 mins until cheese is melted and slightly brown.
**These were very tasty! I was almost afraid that I'd miss the meat...well not so much me, but K. He really did like then and they are super healthy(although I suppose they could have been healthier if I used baked chips and they were whole grain ones, but you can't win them all!) YUM!
Wednesday, August 4, 2010
Mozzarella Sticks and Rice Balls
These recipes come from the Deceptively Delicious book....I have adapted them a bit as I didn't have a couple of key ingredients, but I think it will still work.(I really just switched what purees I used!) So after making a mess once again with the rolling, dipping, and breading....dinner is waiting to be cooked!
 Mozzarella Sticks-shared from Deceptively Delicious
1 cup whole wheat breadcrumbs(I used panko)
1 tbsp flaxseed meal
1 tsp sesame seeds(optional)
1 cup shredded mozzarella cheese
1 tbsp cornstarch
1/2 cup cauliflower puree
spray oil
Mix together breadcrumbs, flax meal, and sesame seeds. Set aside. Combine cornstarch, cheese, and puree. Mix together well. Shape into 2 inch logs and roll in breadcrumb mixture. Place on cookie sheet. Place in freezer for 20 mins and cook at 400 degrees for 15 mins until golden brown. *I did end up doubling this recipe.
**These were pretty good...but next time I will fry them instead, maybe. By the time they were done they looked more like "planks" than sticks. They reminded me of fried cauliflower with cheese. You could still taste the cauliflower although the author claims you can't. K got it right without knowing what it was.
 Rice Balls-adapted from Deceptively Delicious
1 cup brown rice, cooked
1/2 cup sweet potato puree
1 cup white beans(or 1/4 cooked chicken)
1 tsp salt
1/4 cup shredded cheese
1/4 cup lowfat buttermilk
1 large egg, beaten
1/2 cup spinach or broccoli, or butternut puree(I used cauliflower)
1 1/2 cups whole wheat breadcrumbs(I actually used panko and flax meal)
Mix together cauliflower and egg. Set aside. Place breadcrumbs into shallow bowl or plate. In a blender or food processor, combine sw. potato puree, buttermilk, cheese, salt, and beans(or chicken). Puree until combined. Stir in rice. Shape into balls, roll in cauliflower and dip into breadcrumbs. Place on cookie sheet. Cook at 400 degrees for 20-30 mins until golden brown.
*I am not sure why, but my mixture was very wet...so after I dipped a few in the cauliflower, I decided I no longer needed it. So I just went straight to the breadcrumbs after making a ball. This could have been because of the beans. So just in case, I'd make the filling and see if you need the cauliflower/egg mix to coat it.
**These were just ok...you could still taste the sweet potato, which was fine. But they weren't something that I thought was the best thing I have ever tasted. The boys ate more of this than the mozz. sticks so I guess that was a win, but not sure they were worth the extra effort.

1 cup whole wheat breadcrumbs(I used panko)
1 tbsp flaxseed meal
1 tsp sesame seeds(optional)
1 cup shredded mozzarella cheese
1 tbsp cornstarch
1/2 cup cauliflower puree
spray oil
Mix together breadcrumbs, flax meal, and sesame seeds. Set aside. Combine cornstarch, cheese, and puree. Mix together well. Shape into 2 inch logs and roll in breadcrumb mixture. Place on cookie sheet. Place in freezer for 20 mins and cook at 400 degrees for 15 mins until golden brown. *I did end up doubling this recipe.
**These were pretty good...but next time I will fry them instead, maybe. By the time they were done they looked more like "planks" than sticks. They reminded me of fried cauliflower with cheese. You could still taste the cauliflower although the author claims you can't. K got it right without knowing what it was.

1 cup brown rice, cooked
1/2 cup sweet potato puree
1 cup white beans(or 1/4 cooked chicken)
1 tsp salt
1/4 cup shredded cheese
1/4 cup lowfat buttermilk
1 large egg, beaten
1/2 cup spinach or broccoli, or butternut puree(I used cauliflower)
1 1/2 cups whole wheat breadcrumbs(I actually used panko and flax meal)
Mix together cauliflower and egg. Set aside. Place breadcrumbs into shallow bowl or plate. In a blender or food processor, combine sw. potato puree, buttermilk, cheese, salt, and beans(or chicken). Puree until combined. Stir in rice. Shape into balls, roll in cauliflower and dip into breadcrumbs. Place on cookie sheet. Cook at 400 degrees for 20-30 mins until golden brown.
*I am not sure why, but my mixture was very wet...so after I dipped a few in the cauliflower, I decided I no longer needed it. So I just went straight to the breadcrumbs after making a ball. This could have been because of the beans. So just in case, I'd make the filling and see if you need the cauliflower/egg mix to coat it.
**These were just ok...you could still taste the sweet potato, which was fine. But they weren't something that I thought was the best thing I have ever tasted. The boys ate more of this than the mozz. sticks so I guess that was a win, but not sure they were worth the extra effort.
Monday, August 2, 2010
Aloha Chicken Fingers/Nuggets

A few weeks ago when on vacation I bought "Deceptively Delicious" by Jessica Seinfield. It was part of the Kohl's for Kids Campaign and only $5! So I splurged...I wasn't sure how I was going to like it, but I have found a few recipes in it to try. This one was definitely a winner! Actually the original recipe is called Aloha Chicken Kabobs...but I find kabobs to be tedious to make and then I burn the skewers, so I opted not to do them!
You may want to prepare this chicken WITHOUT your children present so they don't see what the secret ingredients are. Although, my boys didn't care!
Aloha Chicken Fingers-Deceptively Delicious
1-2 lbs boneless, skinless chicken breast
1 cup panko bread crumbs(or whole wheat bread crumbs)
1/4 cup shredded coconut
1/4 cup ground flax seed meal
1/2 cup sweet potato puree
1/4 cup pineapple puree
1 large egg white, beaten
1 tbsp reduced sodium soy sauce
1/4 cup flour
water
In a shallow bowl, mix together bread crumbs and flax seed. Combine purees, egg white, soy sauce, and coconut. Mix together in shallow plate/bowl. *I found this to be VERY thick, so I added some water to help thin it out. Place 1/4 cup flour onto another plate. Cut chicken into nugget or finger shapes. Dredge chicken in flour, followed by puree mix, and then breadcrumbs. Place on non-stick pan or greased cookie sheet. Spray with non-stick cooking spray. Place in 400 degree oven for 20-30 mins until cooked through.
**K and I really enjoyed them...but now I remember WHY I don't make these often. They are quite a bit of work, but we did decide they were worth it. K had no idea about the hidden ingredients but he could taste the coconut. The boys ate a couple bites...someday I will figure out WHY they won't eat the good homemade nuggets...These were perfectly crunchy and yummy without the frying!
Wednesday, July 28, 2010
Beef Empanadas

Just in case you haven't seen yet, you should head over to Hallee the Homemaker and see her WONDERFUL blogiversary prize she is awarding to one lucky winner! It is something all cooks/bakers need...and I love mine, but love this one more!!
Beef Empinadas-adapted from Jenn's Food Journey and Hallee the Homemaker
Dough:
2 cups whole wheat flour
1 tsp kosher salt
10 tbsp cold butter, cut up
4-6 tbsp COLD water
Mix flour and salt together. Cut in butter using a pastry cutter, fork, or fingers until dough looks like peas. Slowly add in 4 tbsp water and mix gently with fork, keep adding water 1 tbsp at a time until a soft dough forms. Divide dough in half, kneed a couple times(not too much as it makes it tough), flatten, and roll out. Using a circle cutter cut out circles, place on cookie sheet. Continue until all dough has been cut. *Becareful not to re roll the dough to many times as you want a flaky crust.
Filling:
1 lb ground meat(I used beef)
2 tsp taco seasoning
4 oz cream cheese
1/2 cup(or so) shredded sharp cheese
hand of of grape tomatoes, diced
Brown meat in pan and season with spices. Drain. Add in tomatoes and stir. Add in cheese and stir until melted and well combined. Cool.
Once slightly cooled, place 1-2 tsp of filling in the middle of each circle. Dampen edges with water, fold over, and press. Seal with a fork. Place on cookie sheet and bake at 400 degrees for 10-15 mins until golden brown. *I did have some filling leftover that I will use in a quesidilla or something.
**These came out excellent! K said they tasted like a taco...while I didn't "use" my recipe for taco seasoning I did use the same spices, but it was eye balled. So for recipe sake I just said to use that. You can add whatever spices you would like. K really enjoyed them as did I. A even ate one and Q ate a bit of one. So while they were a bit labor intensive they were still worth it! They were small and a picture is coming once I can use the laptop again, I just don't know where the supply is for the camera!
Friday, June 4, 2010
Black Bean and Corn Salsa

Black Bean and Corn Salsa- shared from Eat at Home
1 2/3 cup black beans(or 1 can rinsed and drained)
1 2/3 cup corn(or 1 can rinsed and drained
1 can diced tomatoes with green chilis
1 cup shredded cheese(I used cheddar w/ jalepenos)
salt to taste
handful of chopped cilantro(optional)
Mix together all ingredients except cheese. Add cheese before serving. Serve with tortilla chips or over a salad.
**So pretend that looks like salsa...and not nachos! I repurposed the leftovers into nachos. Everyone at the party loved it and it was very easy to make!
Tuesday, May 11, 2010
Bacon, Cheese, and Tomato Crescents

Bacon, Cheese, and Tomato Crescents- adapted from Kraft
1 homemade crescent rolls dough(1 portion)
1/2 lb bacon, browned, crumbled
4 oz softened cream cheese
1-2 tomatoes, deseeded, chopped
1 red pepper, finely chopped(omitted)
Shredded cheese
Roll dough out into 1/4 inch thick circle. Cut into triangles. Spread each triangle with cream cheese, top with tomatoes, bacon, and cheese. Starting at the long end, roll up. Let rise for 20-30 mins until doubled. Place in 375 degree oven for 12-15 mins.
**These were just ok...K and Q loved them. I thought they needed more flavor. K said I should add bacon or something, apparently he didn't get any bacon in the 2 bites he had taken. I felt like ranch would have been better than the cream cheese.
Subscribe to:
Posts (Atom)